

Have you ever wanted to sew half square triangle quilt blocks? The math can be pretty intimidating, so today I’m sharing a really easy way to make half square triangles in a variety of sizes from 2-1/2″ to 6-1/2″ including a beginner-friendly pillow project.

This post contains affiliate links. I may receive compensation (at no added cost to you) if you make a purchase using these links. I am a 2020 Brand Ambassador for Michael Miller Fabrics, and this post is part of our ongoing collaboration. Additional materials for this post were generously provided by Baby Lock, Clover USA, Fairfield USA, Fiskars, and Oliso.
Half square triangles, also known as HSTs, are one of the classic quilt blocks that a lot of beginner sewists and quilters are afraid to tackle. There’s some math involved (a scary thing for most Americans, who are math-phobic in general) and, of course, there’s also the lining up of corners and points. These are things that can be intimidating so in today’s project, I’m going to show you how to gently ease yourself into half square triangles with no math (yay!) and very few points that have to line up (also yay!).
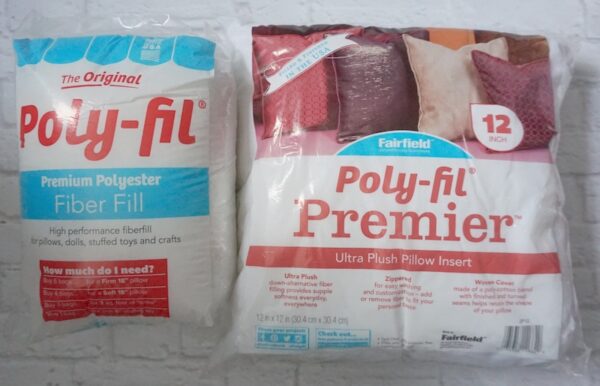
I went to an influencer breakfast hosted by Laura Kelly Designs at Creativation (the annual trade show for the craft industry) in January, and inside the goody bag I found this Fairfield Poly-Fil Premier 12″ Pillow Insert.
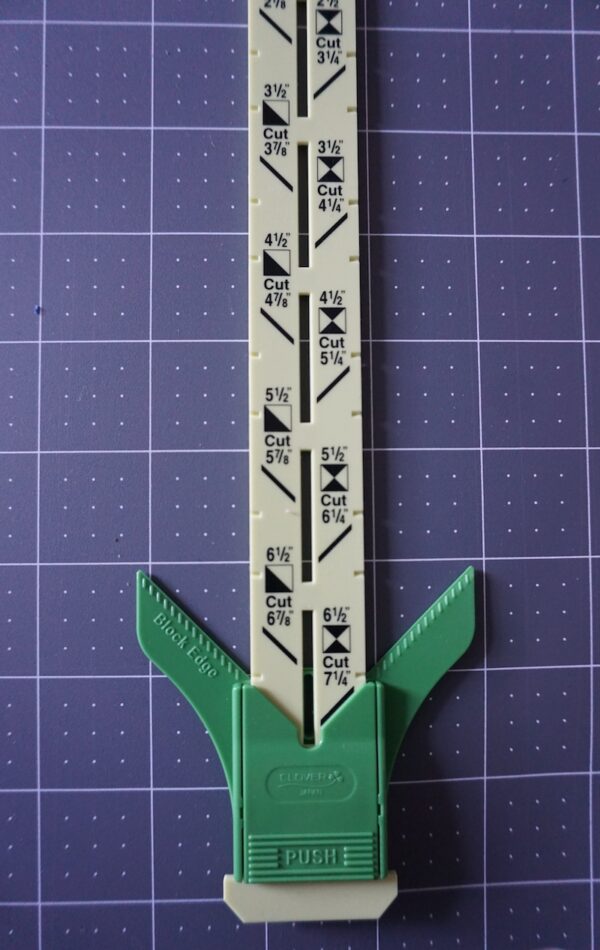
When I went to Quilt Market last fall, I had the chance to see Clover’s No-Hassle Triangle Gauge in action. This little tool is my easy peasy solution to making half square triangles. (It can also be used for quarter square triangles.) I thought a small pillow project would be a great way to use half square triangles, so now I just needed the perfect fabric to make the project come to life.
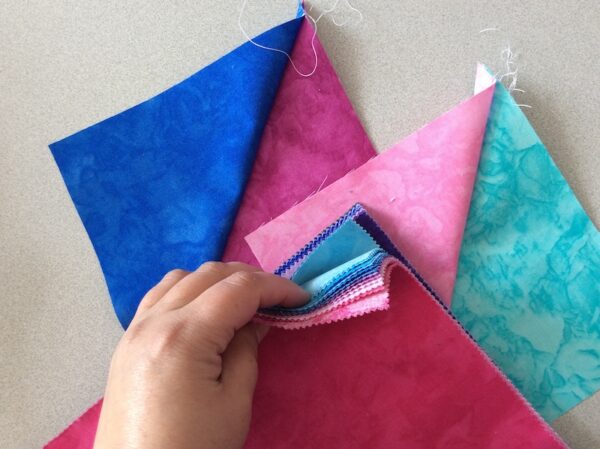
Luckily, there was an abundance of beautiful fabric inside my Brand Ambassador welcome box from Michael Miller Fabrics. Pretty fabric always makes sewing more fun, and for this pillow I had my eye on these 10″ Squares in Krystal Brights.

If you haven’t yet worked with pre-cut fabric, you will find that it is much easier to deal with than yardage for a quick project. There is far less folding, ironing, measuring,… well, far less most things that aren’t, you know, the sewing! In each pack of 10″ squares there are 30 pieces of fabric, each in a different color. For this project, I used eight colors in total. I started with four because I wanted to pick the rest once I had some of the squares assembled so I could see how much contrast to add. I love pinks and purples and blues, so this is pretty much my dream pack of pre-cuts. I actually had a hard time narrowing down my choices.

So, are you ready to get started?
Easy Half Square Triangles Pillow
Sewing Project by Underground Crafter

Pillows are great projects for trying out new techniques because they are small and quick-to-finish. They also brighten up a room and add a handmade accent. Pillows make great gifts, too!
Finished Size
- Fits a 12″ (30.5 cm) square pillow form.
Tools
- Sewing machine. I used my Baby Lock Jubilant. You can read my review and see what’s in the box here.
- Clover No-Hassle Triangle Gauge.
- Clover Air Erasable Fabric Marker.
- Clover Flower Head Pins and/or Clover Wonder Clips.
- Oliso Mini Project Iron and Mountain Mist Wool Pressing Mat.
- Fiskars Easy Change Ergo Control 45 mm Rotary Cutter, Folding Cutting Mat, and Folding Acrylic Ruler, OR fabric shears and ruler.
- Basic sewing supplies (seam ripper, thread snips, etc.).
- Hand sewing needle for finishing.
Materials
- 8 squares from the Michael Miller Fabrics 10″ Squares in Krystal Brights. You could also cut 8 squares from yardage (see measurements below).
- Thread in your choice of color for stitching and bobbin.
- Invisible thread.
- Fairfield Poly-Fil Premier 12″ Pillow Insert
Instructions
Cut Fabric
- Here’s the first easy part. The Clover No-Hassle Triangle Gauge tells you exactly what size to cut your fabric to, depending on the size you want your finished squares to be. For this project, you’ll need a total of eight squares, cut to 6-7/8″ as shown on the left side of the ruler in the picture below. (After sewing, these squares will measure 6-1/2″.)
- Tip: Stack your Michael Miller Fabrics 10″ Squares in Krystal Brights in layers. Pair colors you’d like to combine into a single finished half square triangle square together. Put the first fabric face up and the second fabric face down. Once you cut, your fabrics will be in position for sewing.
- Use your ruler and cutting mat to measure the squares down to the required size, then cut with your rotary cutter.

- Put those the strips left from each pre-cut aside for a future project!
Prepare Fabric for Sewing
- Position your paired squares with the wrong side up (right sides facing) under the No-Hassle Triangle Gauge. Use your Air Erasable Fabric Marker to create a line following the notches on the Gauge.

- To make half square triangles, you’ll use this line as the edge of your 1/4″ seam.

Sew Half Square Triangles
- Place the first pair of squares in your sewing machine so that the line is the edge of a 1/4″ seam. If you have a 1/4″ presser foot, like I do, you can line up the outer edge of the foot with the line.
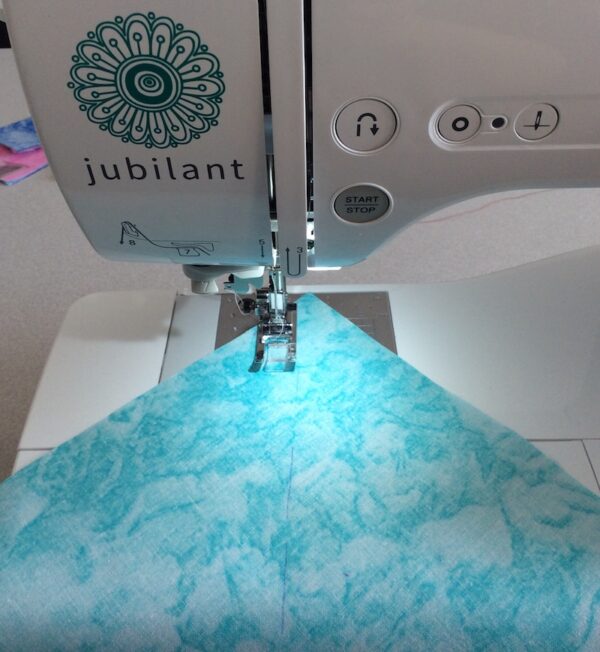
- Once you’ve sewn a seam down the square on one side of the line, remove the fabric and sew a 1/4″ seam down the other side of the line.

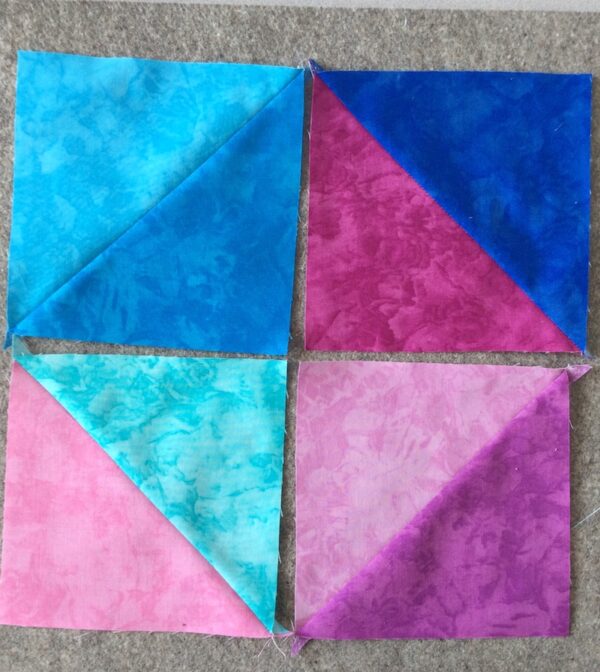
- When you remove the fabric from the machine, you should have a seam on each side of your line. Using your rotary cutter or fabric shears, cut along the line between the seams.
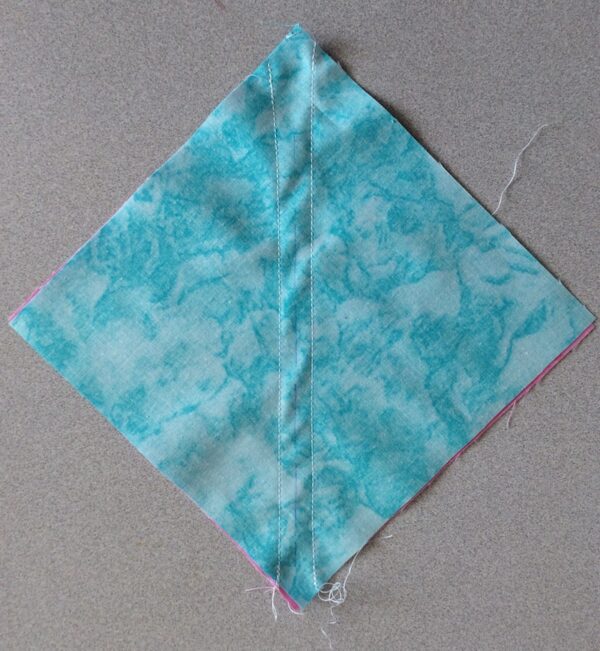
- You’ll now have two squares, each with half square triangles.
- Continue this process until you have eight squares (two will be cut from each of your four paired fabrics).
- Side note: As I mentioned, I started with my four favorite fabrics from the 10″ Squares in Krystal Brights and then picked four more colors.
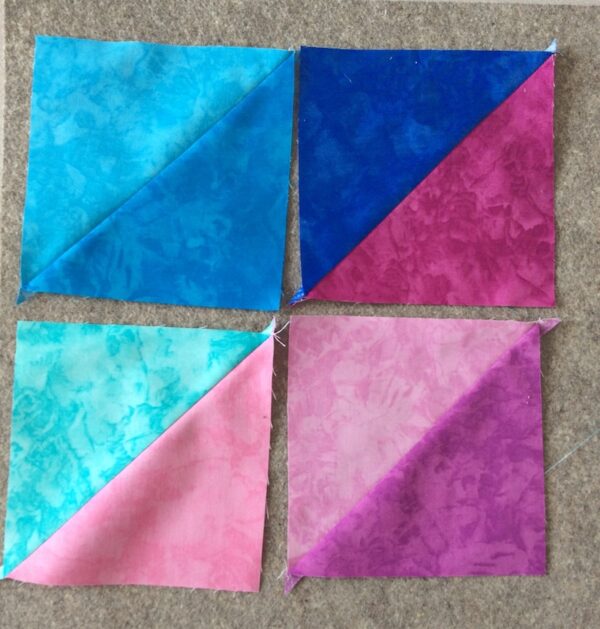
- Once all of your squares are cut, you’ll need to press the seams. I use the Oliso Mini Project Iron for quick projects since it has it’s own protective base and I don’t need to pull out the ironing board.
- Press the seams towards the darker fabric.
- Tip: Stack all of your cut squares with the dark fabric on top so you can quickly press each seam in the same direction. Since I’m right handed, I open my squares to the left. If you’re left handed, you’ll want to reverse the triangle points if you open to the right.

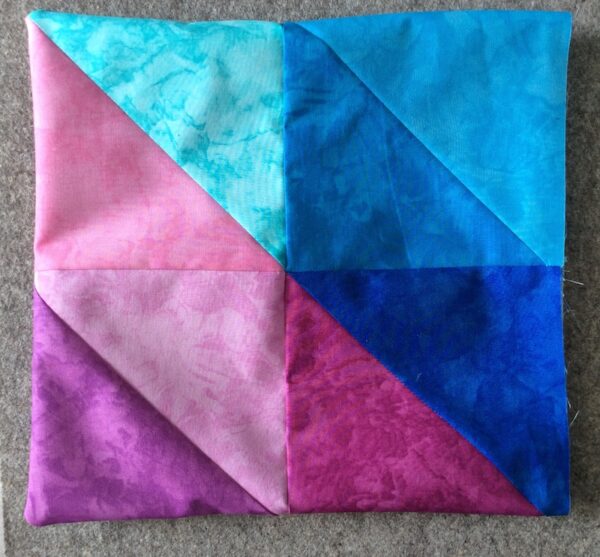
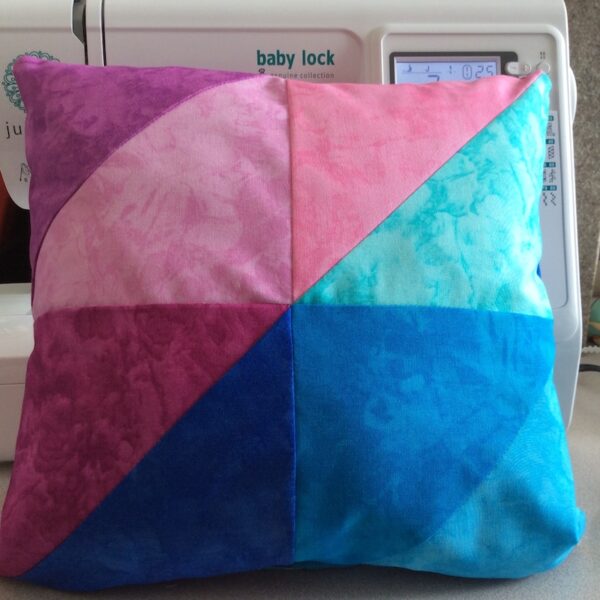
- Once all of your squares are pressed, you’ll want to think about layout.

- Your first instinct might be to try a layout like this one…
- … but I don’t recommend it if you’re a piecing newbie or if you’re out of sewing practice. This layout requires a lot of perfectly lined up pieces and you may be frustrated, especially if you’re looking for a quick easy project. Instead, try the simple layout below that I used in my pillow.
- You’ll want to trim off those tiny triangles that extend over the sides of your squares since they can add bulk to your seams.
- Before returning to the sewing machine, pin this next set of squares. Place the squares right sides together. Start at the center seams to make sure they line up.

- Continue to add pins, working from the center out to the edges.
Sew Pillowcase
- Sew the squares with right sides together, using a 1/4″ seam, and following your selected layout of 2 x 2 squares for the front of the pillow case and 2 x 2 squares for the back of the pillow case. I used the same layout on both sides but you could also use two different layouts.
- Once you have the front and back of the pillow case sewn, press the seams again. Then place the front and back of the pillow case right sides together.

- Sew around 3 sides using a 1/4″ seam. Trim all threads and turn your pillow case right side out.
- Now you’ll want to use your iron to gently press a seam into the raw edge side of your pillow. I personally don’t measure but go for an approximately 1/4″ seam. First I fold the seam, and then I use the iron to press it into place.
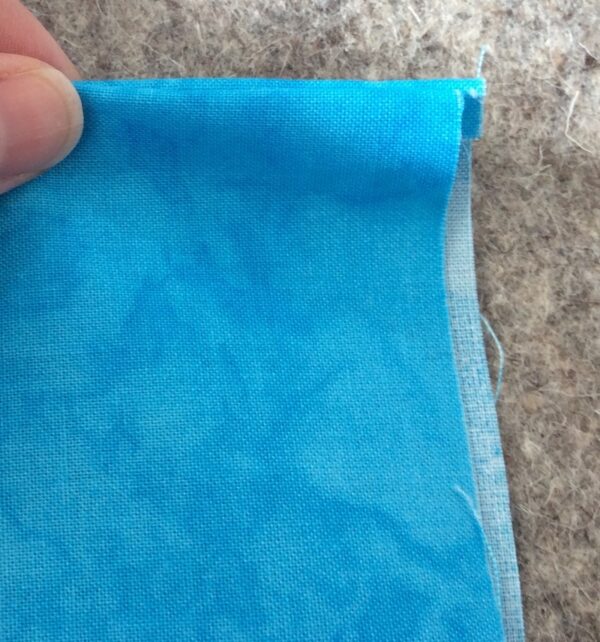
- This fold will make it much easier to hand sew the last edge closed.

- Insert your pillow form into the pillow case after removing the tag from the pillow.

- Use the fold you pressed into the fabric…

- … to fold under this raw edge. I used Wonder Clips to keep the edge closed while finishing, but you can also use pins.

- Thread the hand needle with invisible thread, and hand sew the final seam closed. If you like to live dangerously (or, if you are confident in your machine sewing skills), you can instead top stitch in the machine using invisible thread for both top and bobbin, but be aware that because of the pillow’s bulk, this is quite challenging to do.
I hope you enjoyed this easy peasy way of making half square triangles and this quick pillow project. I find that sewing is always more fun with pretty fabrics like Michael Miller Fabrics Krystal Brights, and now I have a gorgeous pillow, too!