

I’m thrilled to be kicking off the second annual Christmas in July Make Along with this crochet cat pattern! Caterina the Cat is a little, handheld kitty that makes a great portable softie. You can also use this crochet cat pattern as an ornament or gift tag.

This post contains affiliate links. I may receive compensation (at no added cost to you) if you make a purchase using these links. Materials for this project were generously provided by Lion Brand, Fairfield World, Furls, and Clover USA.
I may or may not be a little bit obsessed with cats. After all, I’ve designed (so far) seven crochet cat patterns and a cat knitting pattern, too. If you’re as into cats as I am, don’t forget to check out…
- Kitty in a Romper,
- Black Cat Softie,
- Mr. Putty Cat, Sr.,
- Putty Cat, Jr.,
- Sleeping Kitty Lovey,
- Patchwork Cat (all crochet), and
- Cuddle Kitty (knitting).

If you enjoy this pattern, it’s part of a series of pocket-sized animal buddies. You can also check out the Amigurumi Baby Penguin, Amigurumi Polar Bear, and Amigurumi Seal.

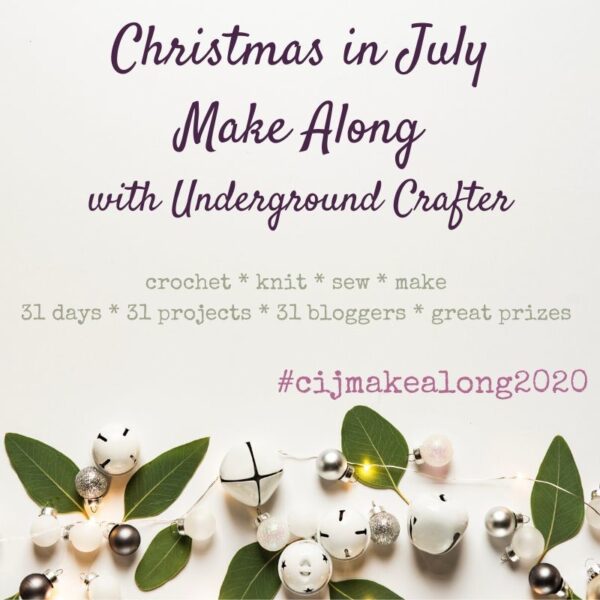
This pattern is the first in the second annual Christmas in July Make Along. Get all the details on this fun virtual event, including a list of participating bloggers, the schedule, and how to enter to win the prizes from Baby Lock, Clover USA, Knitter’s Pride, and WeCrochet in this blog post.
- You can join the Christmas in July Make Along by crocheting, knitting, sewing, or making the projects as you have time.
- Share your progress and post pictures of your finished projects. Tag your projects and posts #CIJMakeAlong2020 on all social media.
- If you’d like to chat with other crafters, join the Underground Crafters Facebook group.
- By the end of the Make Along, you’ll have up to 31 awesome projects. Get ready for the handmade holiday season while having fun with us!
- If you’d like regular email reminders during the Make Along, sign up for the Underground Crafter newsletter.
- Don’t forget to enter the giveaway here by Tuesday, August 4, 2020 at 11:59 p.m. Eastern.
- Use this button below on your Ravelry project pages or elsewhere on social media. Right click (on desktop) or tap and hold (on mobile) to save.
If you make your own Caterina the Cat, I’d love to see it! Share your progress and questions by tagging me on Bluesky as @UndergroundCrafter, Facebook as @UndergroundCrafter, or on Instagram as @ucrafter. You can also share a picture in the Underground Crafters Facebook group. Sign up for my weekly newsletter and get a coupon code for your choice of one of my premium patterns and private access to my vault of subscriber goodies. Plus, you’ll never miss one of my free patterns again!
Add Caterina the Cat to your favorites or queue, or buy the ad-free PDF on Ravelry.

Caterina the Cat
Crochet Cat Pattern by Underground Crafter


This little kitty is sized as a handheld softie, but also can be used as an ornament or gift tag. Caterina the Cat is the first pattern in the 2020 Christmas in July Make Along.
Finished Size
- Approximately 5” (13 cm) tall x 3” (7.5 cm) wide before stuffing.
Materials
- Lion Brand Heartland yarn (100% acrylic, 5 oz/142 g, 251 yd/230 m) – 1 skein in 151 Katmai, or approximately 50 yd (45.5 m) in any medium weight yarn.
- Furls Streamline Swirl US Size G-6/4 mm crochet hook, or any size needed to obtain correct gauge.
- 12 mm cat safety eyes – 1 pair.
- 12 mm pink heart craft nose – 1.
- Fairfield Poly-Fil Premium Polyester Fiber Fill – 12 oz bag.
- Clover Quick Locking Stitch Marker Set, or at least 2 stitch markers.
- Clober Chibi yarn needle.

Gauge
- 10 sc = 2” (10 cm) across. Exact gauge is not critical for this project. Stitches should be small so that fiber filling doesn’t show.
Abbreviations Used in This Pattern
- bob – 5-repeat bobble – [Yo, insert hook in st, yo and draw up a loop, yo and draw through 2 loops] 5 times in same st, yo and draw through all 6 loops on hook. A helpful video tutorial for this stitch is available below.
- If you can’t see the video above for the bob, click HERE to watch it on YouTube.
- ch – chain
- pm – place stitch marker
- rep – repeat
- sc – single crochet
- sc2tog – single crochet 2 stitches together (decrease) – [Insert hook in next st, yo and draw up a loop] twice, yo and draw through all 3 loops on hook. A helpful video tutorial for this stitch is available below.
- If you can’t see the video above for the sc2tog, click HERE to watch it on YouTube.
- sl st – slip stitch
- st(s) – stitch(es)
- yo – yarn over
- *Repeat instructions after asterisk as indicated.
- [] Repeat instructions between brackets as indicated.
Pattern Notes
- The Front and Back Pieces are crocheted flat in rows. Edgings are crocheted in the round.
- Ch 1 at beginning of Rows does not count as a stitch.
- A helpful video tutorial for seaming crochet pieces together with the mattress stitch is available below.
- If you can’t see the video above for the mattress stitch, click HERE to watch it on YouTube.
Pattern Instructions
Back Piece
- Ch 6.
- Row 1: Turn, skip 1 ch, sc in next 5 sts. (5 sts)
- Row 2: Turn, ch 1, 2 sc in first st, sc to last st, 2 sc in last st. (7 sts)
- Rows 3-5: Rep Row 2, 3 times. (13 sts)
- Row 6: Turn, ch 1, sc in first st and in each st across.
- Rep Row 6 until piece measures approximately 2” (5 cm) long. Pm in first and last stitch of Row to mark front leg placement.
- Rep Row 6 until piece measures approximately 4” (10 cm) long.
- Row 7: Turn, ch 1, sc2tog in first 2 sts, sc in each st across to last 2 sts, sc2tog. (11 sts)
- Rows 8-10: Rep Row 7, 3 times. (5 sts)
Back Piece Edging
- Round 1: Turn, ch 1, sc in next 5 sts, turn to work along side of unfinished edge, sc in side of each row across to foundation chain, turn to work along foundation ch, sc in unworked side of next 5 sts from foundation chain, turn to work along side of unfinished edge, sc in side of each row across to first sc, join with sl st. Fasten off.
Front Piece
- Rep instructions for Back Piece through Row 10.

Front Piece Edging
- (Wrong Side) Turn, ch 1, begin working in the round, bob in first st, sc in next 3 sts, bob in next st, turn to work along side of unfinished edge, sc in side of each row across to marked row, bob in side of marked row, sc in side of each row across to foundation chain, turn to work along foundation chain.
Form First Ear
- Begin working in rows.
- 2 sc in first st on foundation chain, sc in next st. (3 sts)
- Turn, ch 1, sc2tog in first 2 sts, sc in next st. (2 sts)
- Turn, ch 1, sc2tog in first 2 sts. Fasten off. (1 st)
Form Second Ear
- With Wrong Side facing, join with sl st to next st on underside of foundation chain after First Ear on Round 1, ch 1, sc in same st, 2 sc in next st. (3 sts).
- Turn, ch 1, sc2tog in first 2 sts, sc in next st. (2 sts)
- Turn, ch 1, sc2tog in first 2 sts. Fasten off. (1 st)
Continue Front Piece Edging
- With Wrong Side facing, join with sl st to side of foundation chain row after Second Ear, continue working in the round, ch 1, sc in side of same row, sc in side of each row across to marked row, bob in side of marked row, sc in side of each row across to first sc, join with sl st.
- Fasten off with long yarn tail (approximately 24”/61 cm) for seaming.
Assembly and Finishing
- Position Front Piece so that bobble feet “pop” upwards. This is the right side.
- Position safety eyes on face. Attach firmly by securing washers on back. Repeat for craft nose.
- Thread yarn needle with long yarn tail from Front Piece Edging. Starting at back legs, seam pieces together with mattress stitch (see Pattern Notes). Once you have about 2” (5 cm) unseamed remaining, stuff firmly with fiber filling.

- As you finish seaming, continue to stuff.
- With yarn needle, weave in ends.
© 2020, 2025 by Marie Segares (Underground Crafter). This pattern is for personal use only. You may use the pattern to make unlimited items for yourself, for charity, or to give as gifts. You may sell items you personally make by hand from this pattern. Do not violate Marie’s copyright by distributing this pattern or the photos in any form, including but not limited to scanning, photocopying, emailing, or posting on a website or internet discussion group. If you want to share the pattern, point your friends to this link: https://undergroundcrafter.com/2020/07/01/crochet-pattern-caterina-the-cat/. Thanks for supporting indie designers!
