


Since I got my Cricut Maker this summer, I’ve gotten lots of questions from readers through email and on Facebook. I’m going to answer the top 5 questions about the Cricut Maker and show you how to make this adorable, vintage-style bear softie, too.
This post contains affiliate links. I may receive compensation (at no added cost to you) if you make a purchase using these links. This post is sponsored by Cricut, but all opinions and thoughts are my own. My sewing machine sponsor is Baby Lock. Additional materials for this project were generously provided by Madeira USA and Fairfield World.
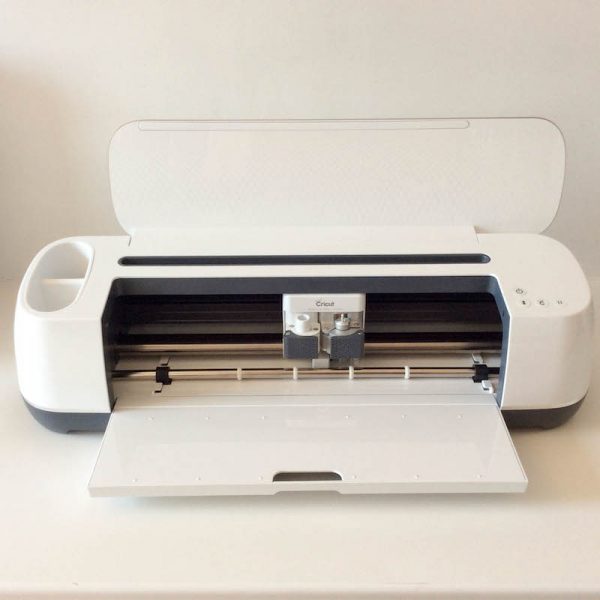
Back in May, I received a Cricut Maker from the nice folks at Cricut. If you’ve been following my blog for a while, you that I had been craving one since they were introduced last August. It’s fair to say that on the day when my Maker was delivered, I was doing quite a bit of dancing around the apartment, composing my own Cricut tunes, and then singing those songs in my lovely off-key voice. MC was a little bewildered at first, but once I explained to him what the Maker was and how it was different than the Explore Air, he was also pretty stoked for me. (But not quite enough to get him singing and dancing, too.)
Earlier this year, I wrote a post answering the twelve most common questions about Cricut, so if you’re completely new to the world of electronic cutting machines, you may want to check that out. In today’s post, I’m going to share answers to the 5 questions I’ve heard the most about the Maker since I got it. If you already have a Maker, you can scroll right down to my Vintage Bear tutorial.
Top 5 Questions About the Cricut Maker Answered!
The questions I hear most often are will I use the Maker enough to justify the price?, what makes the Maker different from other Cricut machines?, what types of fabric can I cut with it without using a backer?, which materials can I cut?, and what kind of DIY projects can I make?
Will I use the Maker enough to justify the price?
Without knowing you and your life personally, I can’t say for sure, but I will say that if you actually do use it regularly, the answer is most likely yes. Here’s why.
- The Cricut Maker is easy to use, right out of the box. If you’ve never even used an electronic cutting machine before, there’s a project (with all the materials!) included to get you started. At the same time, you can link your machine with your computer or tablet and set up your Cricut Design Space account. So yes, if you get one in a Black Friday or Cyber Monday sale, you will have plenty of gifts ready in time for Christmas!
- Cricut Access has TONS of free Ready-to-Make projects included with a subscription. If you are not a graphic designer (and even if you are, but you’re pressed for time), I highly recommend a Cricut Access subscription. You can access projects right away with all the graphics and fonts AND instructions included so you will never be short on ideas for a last-minute gift, card, decoration, or gift wrap.
- If you like to design, you can upload your own images for free. If you’re more of a designer type, you can create your own graphics, use your own fonts, and then upload projects to write, score, and/or cut with just a little adjustment in Design Space. You can find out more about how easy it is to upload images to Design Space in my tutorial for a literary geek t-shirt.
- You can multi-task with the Maker. While my Cricut Maker is cutting my materials, writing out my address labels, or scoring my greeting cards, I can be putting finishing touches on another project or ironing fabric for my next project.
- You can make lots of different types of projects with it. I’ll get more into this one below, but basically if you add up all the gifts, cards, and gift boxes you can use it to make, you’ll probably break even on your costs within the year (or sooner, if you have a large handmade gift list).
- Finally, if price is a big concern for you, get it on sale! Cricut Makers are sold by Cricut, Michaels, Amazon, and other sites, so if you pay attention you can buy one at a great discount, or you can buy a bundle that includes cutting materials.
What makes the Maker different from other Cricut machines?
There are several features and tools that make the Cricut Maker different than the Cricut Explore series (or older Cricut electronic cutting machines). For me, there are two that I use regularly.
- You can cut fabric without a backer. Using the Rotary Blade and FabricGrip Cutting Mat (both included in the box with your Maker), you can cut fabric without a backer. That was the big game changer that made the Cricut Maker “special” for me… but then I learned about the Scoring Wheels.
- You can make the most incredible and precise score lines, even in heavier materials. If you buy the Scoring Wheel and Double Scoring Wheel, you can instantly get over your fear of paper crafting.
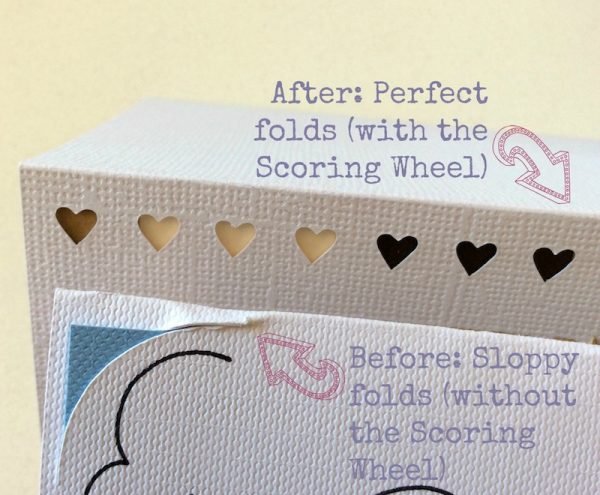
Find out more in these three posts I wrote introducing the Scoring Wheels.
- Get to Know Cricut Maker Scoring Wheels
- How To Make Picture-Perfect Cards (and Other Folds) with the Cricut Maker Scoring Wheel
- How To Make a Foil Poster Board Gift Box with the Cricut Maker Double Scoring Wheel
What else is different?
- The Maker doesn’t have a Smart Dial, so you never need to worry about being on the wrong material setting. You choose your materials in Design Space and then the machine adjusts automatically.
- The Maker has an Adaptive Tool System that tells you which tools to add and when. This is really helpful when you are using new materials and aren’t sure which blade to use.
- The Maker can use several additional blades and tools, including the Rotary Blade, Scoring Wheels, and Knife Blade for thicker materials.
- The Maker has a 2x speed setting. If you’re in a rush, you can crank things up a bit. The Explore Air 2 also has this feature.
What types of fabric can I cut with the Maker without a backer?
As I mentioned, the ability to cut fabric was really what I was looking most forward to in the Maker. You don’t need a stabilizer or other backer to cut fabric as long as you use your Rotary Blade and FabricGrip Cutting Mat (or Knife Blade, for leathers) and choose the right fabric material in Design Space. You can cut most fabrics with the Cricut Maker, including leather, bamboo, boucle, broadcloth, burlap, calico, canvas, cashmere, chiffon, corduroy, cotton, damask, denim, faux fur, felt, fleece, khaki, quilt batting, silk, spandex, suede, and tulle. You can find a full list here, or try another fabric with a thickness of less than 2.4 mm.
Which materials can I cut?
In addition to the 100+ materials that can be cut with a Cricut Explore, and the fabrics listed above, you can also cut thicker materials with the Maker than the Explore. You can find a full list of all the standard materials you can use with the Maker here. My favorite materials to cut are fabric (have I mentioned that already??!!), iron-on, poster board, vinyl, and cardstock.
What kind of DIY projects can I make?
I’ve made a lot of great gifts with the Maker in the past few months, including t-shirts, cards, gift boxes, and more.

The cutting of fabric without a backer is a real game changer for me personally. I’ll be sharing a tutorial for the Vintage Bear, a sewing project using the Maker, further down in this post. As with the Explore series of machines, you can write, cut, and print then cut. But, you can also score MUCH BETTER lines so if you aren’t a paper crafts pro, it means your cards will actually look good with the Maker and the Scoring Wheels. And, did I mention the fabric projects? Design Space now has lots of patterns, so you can choose from quilts, apparel, toys, and more, or you can upload your own sewing projects specs.
I hope I’ve answered all of your Maker questions, but if you have more, don’t hesitate to ask by leaving a comment here, emailing me, or tagging me on social media.
How To Make a Vintage Bear with Cricut Maker
Tutorial by Underground Crafter

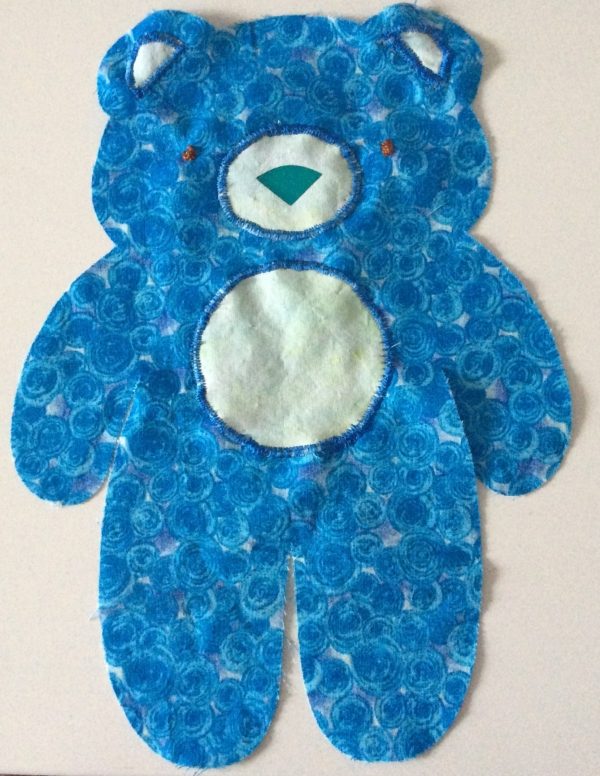
That was a lot of information, so I hope you’re still here for the project! I picked a pattern for a bear softie from Design Space that actually looked very contemporary (or should I say “modern”) and made it my own by giving it a vintage look. This is a low-sew project with some (extremely light) embroidery. I used my sewing machine, but it’s definitely something you can sew by hand. If you’re not big into sewing, you can make the eyes, nose, muzzle, and inner ears using iron-on.
Materials
- Cricut Maker with Cricut Design Space and Cricut Access subscription,
- Rotary Blade and FabricGrip Cutting Mat,
- Premium Fine Point Blade and StandardGrip Cutting Mat (optional, if you use iron-on),
- EasyPress 2 with EasyPress Mat, or iron with other heat-safe surface,
- Iron-on in at your choice of colors and styles (optional, I used this for the nose),
- Washable Fabric Pen,
- Cotton fabric (I used a fat quarter and scraps),
- Small amount of embroidery floss for eyes and tapestry needle,
- Fairfield Nature-Fil Bamboo Fiber Fill,
- Madeira Cotona thread in coordinating or contrasting color to your fabric,
- Baby Lock Jubilant with Zigzag foot (J) and 1/4″ quilting foot, or hand sewing needle, and
- Basic sewing supplies (seam ripper, scissors, etc.).

Instructions
Choose your Pattern in Design Space
- I searched in the Sewing drop down menu for Bear and choose this Simplicity pattern. You will need to purchase the pattern.

Prepare Your Fabric
- Using your EasyPress 2 with EasyPress Mat, prepare your fabric by ironing out any wrinkles and folds.

- I also cut my fat quarter in half along the long edge.
Cut Your Materials
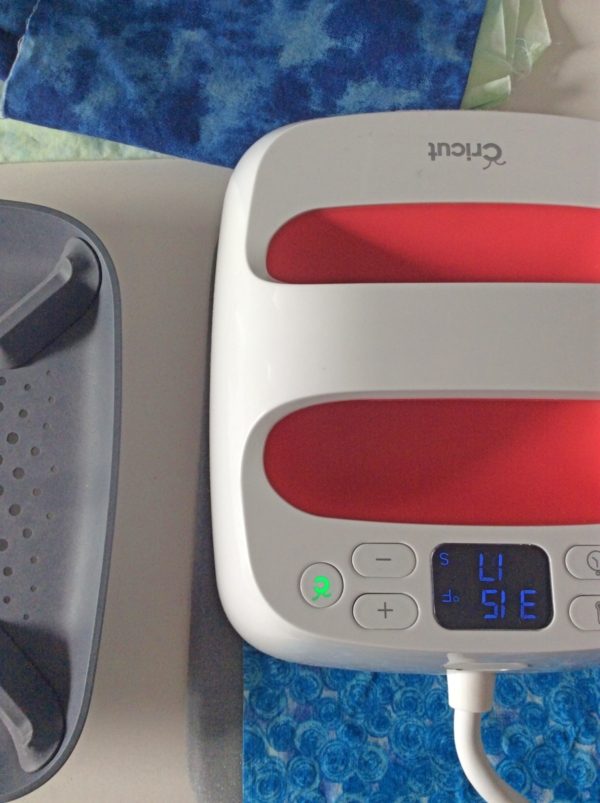
- Use the Rotary Blade and FabricGrip Cutting Mat to cut your fabric. (Since I have the 12″ mat, I changed the mat size in Design Space and used a scissor to cut my fat quarter in half so that it was 9″ x 22″. Design Space will automatically move the back of the bear to a separate mat if you change the mat size.)
- If you use iron-on (I did for the nose), be sure to use the StandardGrip Cutting Mat and change the materials in Design Space. You don’t really need to “mirror” before cutting because the iron-on pieces are symmetrical, but be sure to place the iron-on shiny side down on the mat. Choose your cutting materials in Design Space and it will let you know what to do next!

- I didn’t have a Washable Fabric Pen with me, so I used a standard Cricut Pen for the front piece, since I knew I would sew over the markings. For the rest of the pieces, I took the pen out because I didn’t want permanent marks.

Assemble Your Cut Materials
- Once your project is cut, you can put away your Maker and move on to the sewing and assembly phase.

Add Eyes
- I plan to gift this bear to a small child, so I embroidered on the eyes rather than using buttons or safety eyes.

- Thread the tapestry needle with about 18” (46 cm) of embroidery floss. Start on the back with a knot. I just did covered over the marked spot for the eyes by going back and forth, but a French knot would be cute. You can find a video tutorial for the French knot at the end of this post. Be sure to knot securely on the back before fastening off. Repeat for the other eye.

Assemble Facial Features
- I used iron-on for the nose, so I affixed that to the muzzle first, using Cricut’s recommended heat settings for the type of iron-on and fabric I used.

- Pin the rest of the facial features to the front of the bear.

- Attach the zig zag foot to your machine and adjust the zig zag stitch settings to a short length and a long width. (I used 0.5 length and 3.5 width.) Align the needle so that you work a zig zag stitch along the edges of the facial features (muzzle and inner ears) to create an overcast stitch edging. Go slowly because there are a lot of curves (which mean a lot of turns), removing pins as you go.
Sew Bear Pieces Together
- Once you have the front finished, place the back of the bear on the front of the bear with the right sides facing.

- Start at the groin of the bear and sew around one leg, around the body, and end at the “foot” of the other leg. I used the 1/4″ quilting foot, but you could also use the zig zag foot (or hand sewing).

Stuff Bear
- Now you’re going to turn the bear inside out, being sure to push out the corners of the arms and feet and ears.
- Stuff the limbs and ears firmly first with your Nature-Fil Bamboo Fiber Fill.
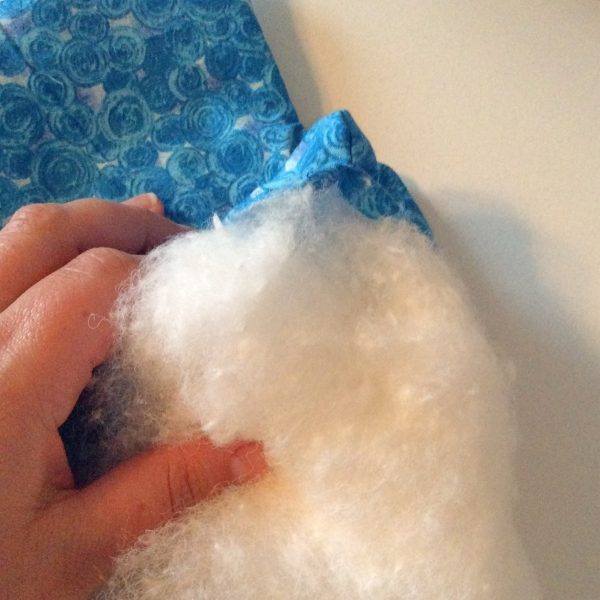
- Then, fill up the rest of the body.

Finish
- Fold over the seam on the edge of the leg. You’ll need to sew this last part by hand. It helps to use a coordinating thread so it isn’t too noticeable.

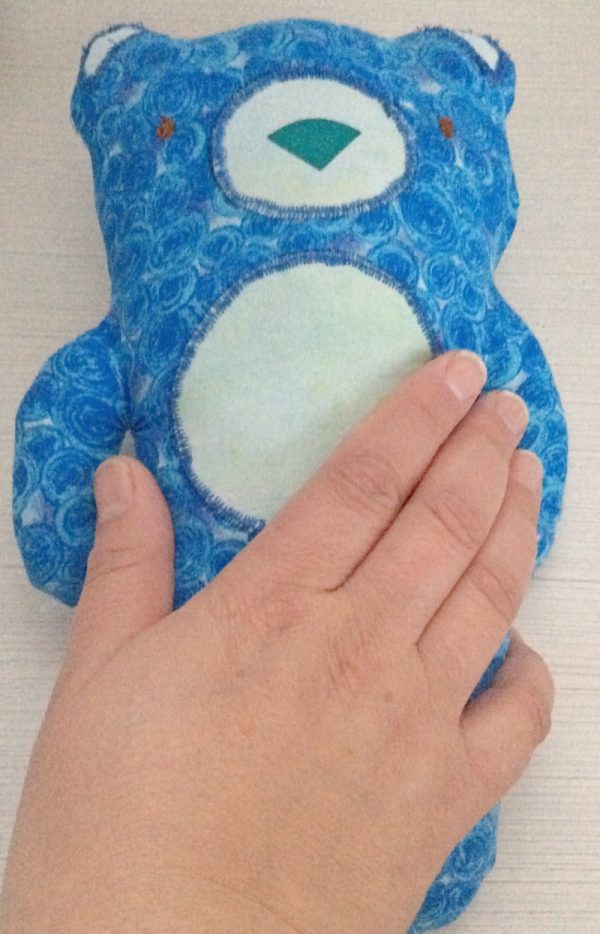
Doesn’t he look ready for a night out in the city?

And, here’s the bear in my hand so you can get a sense of the size.
This is a sponsored conversation written by me on behalf of Cricut . The opinions and text are all mine.