
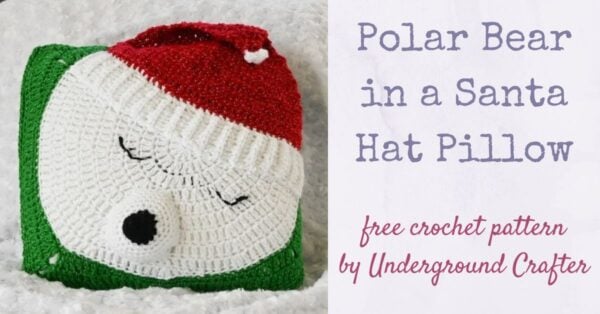
I’m sharing an adorable Christmas crochet pillow pattern as part of the 5th Annual Giftstravaganza Blog Hop! The Polar Bear in a Santa Hat Pillow pattern is forever free on my blog, but you can get the PDF download free through 6am Eastern on November 3, 2026 as part of the blog hop, so read on for details.
This post contains affiliate links. I may receive compensation (at no added cost to you) if you make a purchase using these links. Materials for the sample were generously provided by Herrschners and Denise.
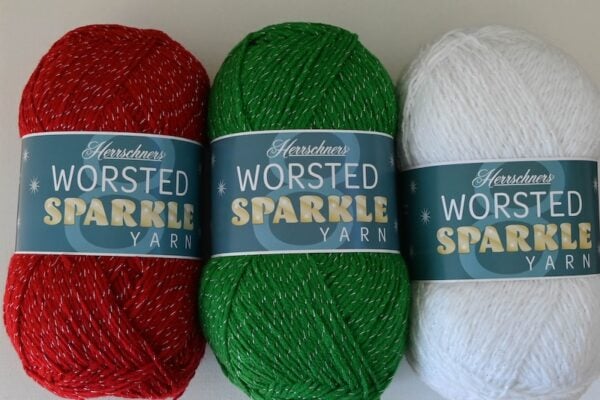
I have an aunt who loves to decorate for Christmas, and I had her on my mind when I saw these three skeins of Herrschners Worsted 8 Sparkle yarn.
One of the fun things about pillows as holiday decor is you can take off the pillow case and slip on a different one to decorate for the next holiday.
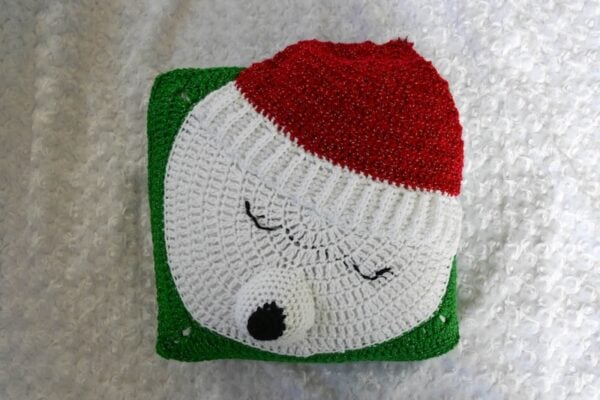
I had a lot of fun making the Polar Bear in a Santa Hat Pillow, and I think you’ll have fun with it, too! There are a lot of ways to customize your version for the holidays. Change up the CA yarn color for different types of bears, or use different colors to make an elf hat instead of Santa hat, or choose different background colors for the pillow. I love the touch of sparkler in this yarn which adds a festive mood.
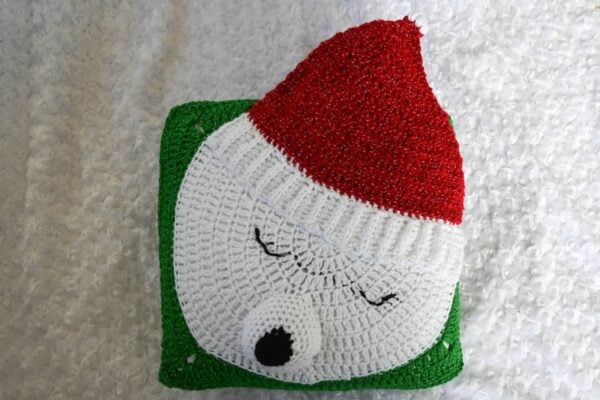
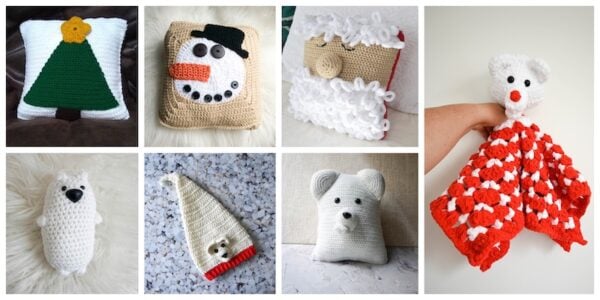
Scroll down for the free Christmas crochet pillow pattern for the Polar Bear in a Santa Hat Pillow. Looking for more Christmas crochet pillow pattern ideas to fit on a pillow form? Check out my free patterns for the Christmas Tree Pillow, Norman Buttons the Snowman Pillow, and the Sleepy Santa Pillow. More of a polar bear fan? Check out the free patterns for the Amigurumi Polar Bear, Osito the Polar Bear Lovey, the Polar Bear Pal, and the Polar Bear Stocking Cap in 10 sizes.
This is the first pattern in the 5th Annual Giftstravaganza Blog Hop. To follow the Blog Hop…
- Sign up for Crochet Along updates and the Underground Crafter newsletter to get regular updates, including links to new CAL patterns as they are released. When you sign up, you’ll also get access to my subscriber vault which includes exclusive free PDF patterns, a coupon code for your choice of any crochet or knitting pattern or ebook from my Ravelry shop, and coupon codes from other indie designers and crafts businesses.
- You can join in by crocheting the patterns as you have time.
- Share your progress and post pictures of your finished projects. Tag your projects and posts #giftstravaganzacal on all social media.
- If you’d like to chat with other crocheters, join the Underground Crafters Community.
- By the end of the CAL, you’ll have up to 30 awesome gifts for the handmade holiday season while having fun with us!
- Use this button below on your Ravelry project pages or elsewhere on social media. Right click (on desktop) or tap and hold (on mobile) to save.
The Polar Bear in a Santa Hat Pillow crochet pattern is the featured pattern for November 1, 2026 in the 5th Annual Giftstravaganza Blog Hop. The pattern is forever free on my blog, or grab the PDF version on Ravelry free with coupon code PBIASHP through 6am Eastern on November 3, 2026, or add the pattern with coupon code to your cart by clicking on the “Giftstravaganza Download today’s featured free PDF pattern” button. Be sure your cart is set to $0 as there will be no refunds for accidental purchases.
Don’t forget to visit the main 5th Annual Giftstravaganza Blog Hop post to get links to all the included patterns and to enter the giveaway for your chance to win a prize from Forbidden Fiber Co., GlassEyesOnline, Knitter’s Relief Balm, LennyMudPottery, Underground Crafter, Unicorn, or WalnutFarmDesigns.
If you make your own Polar Bear in a Santa Hat Pillow, I’d love to see it! Share your progress and questions in the Underground Crafters Community or by tagging me on Bluesky as @UndergroundCrafter, Facebook as @UndergroundCrafter, or Instagram as @ucrafter. Sign up for my weekly newsletter and get a coupon code for your choice of one of my premium patterns and private access to my vault of subscriber goodies. Plus, you’ll never miss one of my free patterns again!
Add the Polar Bear in a Santa Hat Pillow to your favorites or queue, or buy the ad-free PDF on Ravelry.

Polar Bear in a Santa Hat Pillow
Christmas Crochet Pillow Pattern by Underground Crafter
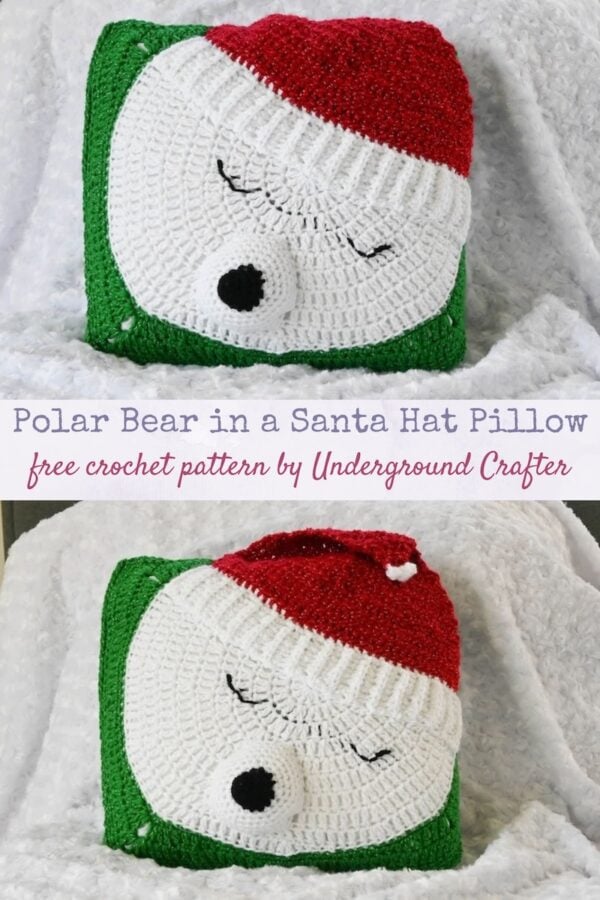



This Christmas pillow crochet pattern has a sleepy polar bear with a Santa hat. It’s easy to vary with different color yarns for the bear or by making the hat with stripes. This is the first pattern in the 5th Annual Giftstravaganza Blog Hop.
Finished Size
- Fits a 16″ (40.5 cm) square pillow form.
Materials
- Herrschners Worsted 8 Sparkle yarn (92% acrylic/8% polyester, 8 oz/226 g, 489 yd/448 m) – 1 skein each in Aran (CA), Victorian Red (CB), and Emerald (CD), or approximately 145 yd (132.5 m) in CA, 60 yd (55 m) in CB, and 235 yd (215 m) in CC in any medium weight yarn.
- Herrschners Worsted 3 yarn (100% acrylic, 3 oz/85 g, 183 yd/168 m) – 1 skein in Black (CD), or approximately 8 yd (7.5 m) in any medium weight yarn.
- Denise2Go US Size J-10/6 mm crochet hook, or any size needed to obtain correct gauge.
- Locking stitch marker.
- 16″ (41 cm) square pillow form.
- Fiber filling.
- 1″ (2.5 cm) diameter sew through or shank button.
- Yarn needle.
Gauge
- 8 hdc3L = 1.75″ (4.5 cm) across. Exact gauge is not critical for this pattern.
- Through Rnd 3 in pattern for Pillow Front = 3.5″ (9 cm) diameter. Exact gauge is not critical for this pattern.
Abbreviations Used in This Pattern
- 3L – third (back) loop – A helpful video showing the third loop is available below.
- If you can’t see the 3L video above, watch it on YouTube.
- BL – back loop only – Fiber Flux has a helpful video showing the back loop here.
- CA – Color A
- CB – Color B
- CC – Color C
- CD – Color D
- ch – chain
- dc – double crochet
- hdc – half double crochet
- hdc2tog – half double crochet 2 stitches together (decrease) – [Yo, insert hook in next st, yo and draw up a loop] twice, yo and draw through all 5 loops on hook. A helpful video for this decrease is available below.
- If you can’t see the hdc2tog video above, watch it on YouTube.
- pf – 5-repeat puff – [Yo, insert hook into st, yo and draw up a loop] 5 times in same st, yo and draw through all 11 loops on hook. A helpful video for this stitch is available below.
- If you can’t see the pf video above, watch it on YouTube.
- pm – place stitch marker
- Rnd(s) – Round(s)
- sc – single crochet
- sl st – slip stitch
- sp – space
- st(s) – stitch(es)
- yo – yarn over
- [] Repeat instructions between brackets as indicated.
- *Repeat instructions after asterisk as indicated.
- () Work stitches between parentheses into same stitch or space.
Pattern Notes
- Ch 1 at start of rows and Rounds DOES NOT count as a stitch.
- Oombawka Design Crochet has helpful photo and video tutorials for starting with the magic adjustable ring here.
- A helpful video showing how to single crochet around the side of your project is available below.
- If you can’t see the video for crocheting around the side of your project above, watch it on YouTube.
- A helpful video for joining with a whipstitch seam is available below.
- If you can’t see the video above showing the whipstitch join, watch it on YouTube.
- Helpful videos showing how to embellish crochet with embroidery are available at the end of this blog post.
- A helpful video showing the single crochet seam is available below.
- If you can’t see the single crochet seam video above, watch it on YouTube.
Pattern Instructions
Pillow Front
Polar Bear Head
- With CA, ch 4, skip 3 ch, join with sl st to first ch to form ring.
- Rnd 1: Ch 1, 12 dc in ring, pm in last st to mark position, move marker up each rnd. (12 sts)
- Rnd 2: 2 dc in each st around. (24 sts)
- Rnd 3: [2 dc in next st, dc in next st] around. (36 sts)
- Rnd 4: [2 dc in next st, dc in next 2 sts] around. (48 sts)
- Rnd 5: [2 dc in next st, dc in next 3 sts] around. (60 sts)
- Rnd 6: [2 dc in next st, dc in next 4 sts] around. (72 sts)
- Rnd 7: [2 dc in next st, dc in next 5 sts] around. (84 sts)
- Rnd 8: [2 dc in next st, dc in next 6 sts] around. (96 sts)
- Rnd 9: [2 dc in next st, dc in next 8 sts] around. (108 sts)
- Rnd 10: [2 dc in next st, dc in next 2 sts] around. (120 sts)
- Rnd 11: Hdc in next 2 sts, sc in next 2 sts, skip 116 sts, fasten off CA. (120 sts)
Continue to Pillow Background
- Rnd 12: Join CC with slstBL to any st, ch 1, scBL in same st and each st around, join with sl st to first sc. (120 sts)
- Rnd 13: Ch 1, starting in same st *2 dc in next st, dc in next 4 sts, hdc in next 6 sts, sc in next 8 sts, hdc in next 6 sts, dc in next 4 sts, 2 dc in next st,** ch 2; repeat from * around, ending last repeat at **, ch 1, join with sc (counts as second ch in ch-2 sp) to first dc. (32 sts/side + 4 ch-2 sp)
- Rnd 14: Ch 1, 2 dc in same sp, *dc in next 32 sts,** (2 dc, ch 2, 2 dc) in ch-2 sp; repeat from * around, ending last repeat at **, 2 dc in first sp, ch 2, join with sc (counts as second ch in ch-2 sp) to first dc. (36 sts/side + 4 ch-2 sp)
- Rnd 15: Ch 1, hdc in same sp, *hdc in next 36 sts,** (hdc, ch 2, hdc) in ch-2 sp; repeat from * around, ending last repeat at **, hdc in first st, ch 2, join with sl st to first hdc, fasten off CC. (38 sts/side + 4 ch-2 sp)
- With yarn needle, weave in yarn tails on wrong side.
Santa Hat
Hat Band
- With CA, ch 9.
- Row 1: Turn, skip 1 ch, hdc in each st across. (8 sts)
- Row 2: Turn, ch 1, hdc3L in first st and each st across.
- Repeat Row 2 until Hat Band measures approximately 14″ (35.5 cm) long. Do not fasten off.
Hat Body
- Row 3: Turn to work along long edge, ch 1, crocheting along the side of your project (see Pattern Notes), evenly work 40 sc across edge, changing to CB with last yo of final sc (see Pattern Notes). (40 sts)
- Row 4: Turn, ch 1, hdc in same st and each st across. (40 sts)
- Rows 5-10: Repeat Row 4, 6 times or until Hat measures approximately 4″ (10 cm) as shown in photo below.
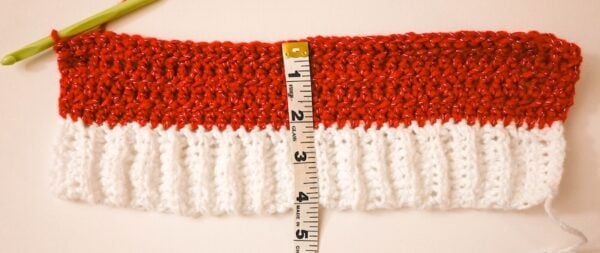
- Row 11: Turn, ch 1, starting in same st [hdc2tog, hdc in next 8 sts] across. (36 sts)
- Row 12: Repeat Row 4 once.
- Row 13: Turn, ch 1, starting in same st [hdc2tog, hdc in next 7 sts] across. (32 sts)
- Row 14: Repeat Row 4 once.
- Row 15: Turn, ch 1, starting in same st [hdc2tog, hdc in next 6 sts] across. (28 sts)
- Row 16: Repeat Row 4 once.
- Row 17: Turn, ch 1, starting in same st [hdc2tog, hdc in next 5 sts] across. (24 sts)
- Row 18: Repeat Row 4 once.
- Row 19: Turn, ch 1, starting in same st [hdc2tog, hdc in next 4 sts] across. (20 sts)
- Row 20: Repeat Row 4 once.
- Row 21: Turn, ch 1, starting in same st [hdc2tog, hdc in next 3 sts] across. (16 sts)
- Row 22: Repeat Row 4 once.
- Row 23: Turn, ch 1, starting in same st [hdc2tog, hdc in next 2 sts] across. (12 sts)
- Row 24: Repeat Row 4 once.
- Row 25: Turn, ch 1, starting in same st [hdc2tog, hdc in next st] across. (8 sts)
- Row 26: Repeat Row 4 once.
- Row 27: Turn, ch 1, starting in same st [hdc2tog, hdc in next st] twice, hdc2tog. (5 sts)
- Row 28: Repeat Row 4 once.
- Row 29: Turn, ch 1, starting in same st, hdc2tog, hdc in next st, hdc2tog. (3 sts)
- Row 30: Repeat Row 4 once, changing to CA with last yo of final hdc, fasten off CB.
- Row 31: Turn, ch 1, pf in first 3 sts, fasten off CA. (3 sts)
- Designate side where puff stitches are “puffiest” as the right (front) side. With yarn needle, weave in yarn tails on wrong side of Santa Hat.
Bear Muzzle
- With CD, start with the magic adjustable ring (see Pattern Notes).
- Rnd 1: Ch 1, 6 sc in ring, tighten magic ring to close, pm in last st to mark position, move marker up each rnd. (6 sts)
- Rnd 2: 2 sc in each st around. (12 sts)
- Rnd 3: Sc in each st around.
- Rnd 4: Repeat Rnd 3 once, fasten off CD.
- Rnd 5: Join CA with sl st to any st on Rnd 4, ch 1, starting in same st [2 sc in next st, sc in next st] around, pm in last st to mark position, move marker up each rnd. (18 sts)
- Rnd 6: [2 sc in next st, sc in next 2 sts] around. (24 sts)
- Rnd 7: [2 sc in next st, sc in next 3 sts] around. (30 sts)
- Rnd 8: [2 sc in next st, sc in next 4 sts] around. (36 sts)
- Rnds 9-10: Repeat Rnd 3 twice, fasten off CA with long yarn tail (approximately 24″/61 cm) for seaming.
- With yarn needle, weave in yarn tail tails from start of Bear Muzzle on inside.
Pillow Back
- Note: This Pillow Back starts with the diagonal box stitch (corner-to-corner crochet) in one color. A helpful video for this stitch is available below.
- If you can’t see the diagonal box stitch video above, watch it on YouTube.
- With CC, ch 5.
- Row 1: Turn, skip 3 ch (counts as ch-3 sp), dc in next 2 ch. (1 box)
- Row 2: Ch 5, turn, skip 3 ch (counts as ch-3 sp), dc in next 2 ch, (sl st, ch 3, 2 dc) in ch-3 sp of previous row. (2 boxes)
Increase to Center
- Row 3: Ch 5, turn, skip 3 ch (counts as ch-3 sp), dc in next 2 ch, *(sl st, ch 3, 2 dc) in ch-3 sp of previous row; repeat from * across. (Increases by 1 box each row)
- Rows 4-15: Repeat Row 3, 12 times, or until Pillow Back measures approximately 1″ (2.5 cm) shorter on straight edge than Pillow Front side.
Decrease to End
- Next Row: Turn, sl st in first 2 sts, *(sl st, ch 3, 2 dc) in next ch-3 sp of previous row; repeat from * across to last ch-3 sp, sl st in ch-3 sp. (Decreases by 1 box each row)
- Repeat Next Row until piece is square. Do not fasten off CC.
Edging
- Rnd 1: Turn, sl st in next 2 sts, sl st in ch-3 sp to corner, ch 1, crocheting along the side of your project (see Pattern Notes), *evenly work 38 sc along side,** ch 1, turn to next side; repeat from * around, ending last repeat at **, join with sc (counts as ch-1 sp) to first sc. (38 sts/side + 4 ch-1 sp)
- Rnd 2: Ch 1, hdc in same sp, *hdc in next 38 sts,** (hdc, ch 1, hdc) in ch-1 sp; repeat from * around, ending last repeat at **, hdc in first sp, ch 1, join with sl st to first hdc, do not fasten off CC. (40 sts/side + 4 ch-1 sp)
Assembly and Finishing
- Begin by assembling and decorating the Pillow Front.
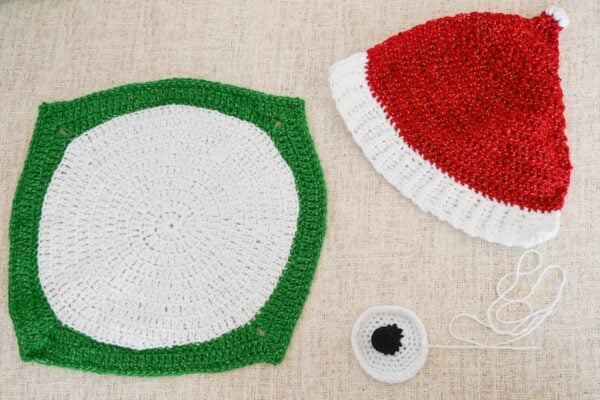
- Position Santa Hat so that it covers the top of the Polar Bear face. Position Muzzle centered below Santa Hat.
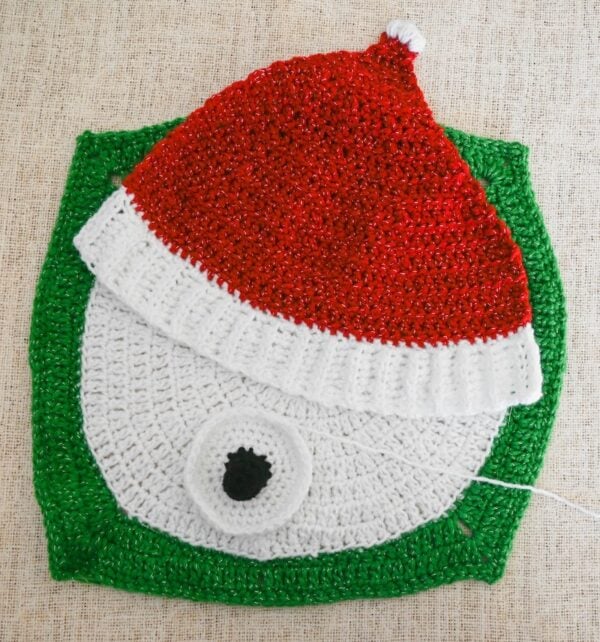
- Stuff Muzzle with fiber filling firmly.
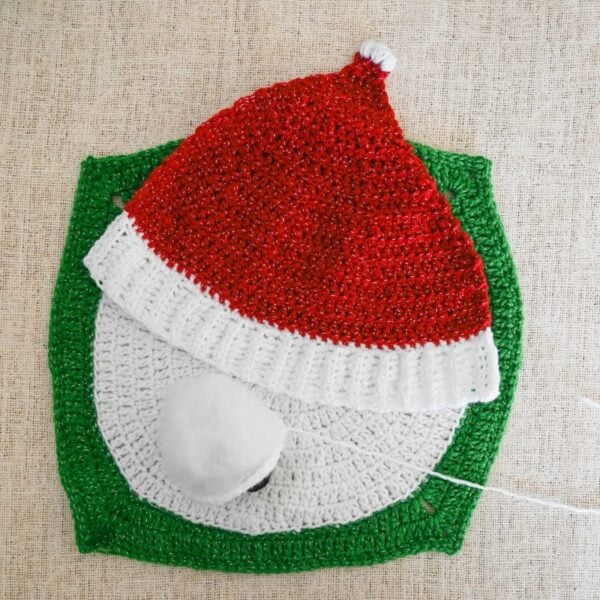
- Thread yarn needle with long tail in CA from end of Muzzle. Join Muzzle to face with whipstitch seam (see Pattern Notes), adding more fiber filling if necessary. With yarn needle, weave in yarn tail on wrong side of Pillow Front.
- Thread yarn needle with approximately 1 yd (1 m) in CA. Starting at first short edge of Hat Band just below CB section, join Hat Band to Pillow Front with whipstitch seam. Work from short edge, across long edge, finishing at the last CA section of the second short edge. Weave in CA on wrong side of Pillow Front.
- Thread yarn needle with approximately 1 yd (1 m) in CB. Starting at CB section of Santa Hat above seamed area, join first angled edge in CB to Pillow front with whipstitch seam until you reach top of Pillow Front.
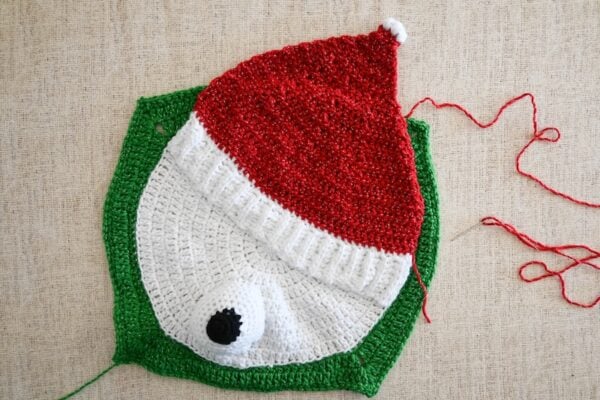
- Work CB through front loops of Pillow Front that sit behind the Santa Hat. (For the way my Santa Hat was positioned, that was 24 loops). Do not join at the top of Pillow Front.
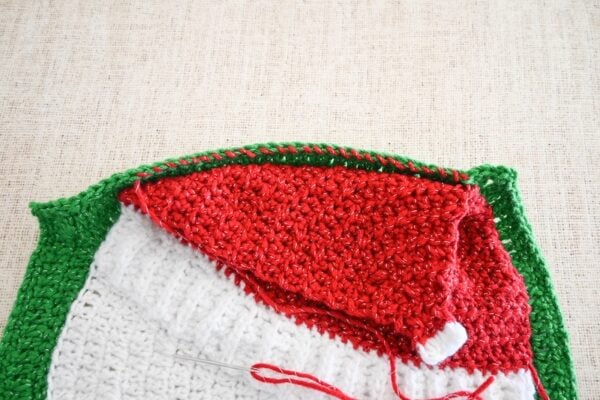
- Continue to whipstitch seam the other angled CB side of the Santa Hat to the Pillow Front until your needle meets the seamed CA section. Weave in yarn tails on wrong side of Pillow Front.
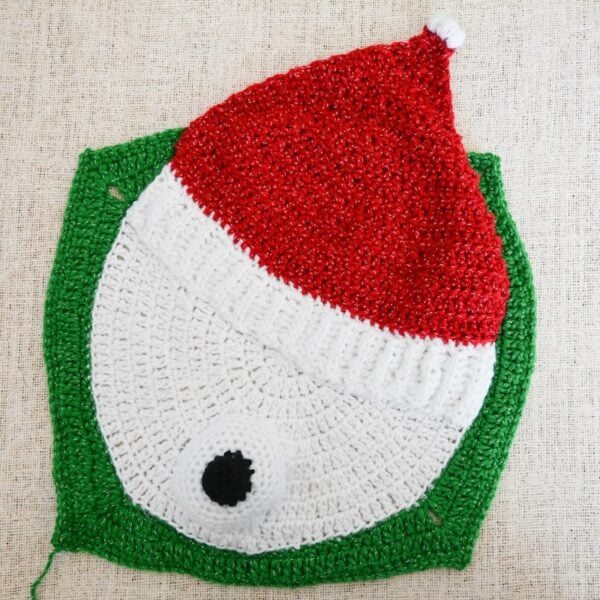
- Thread yarn needle with approximately 1 yd (1 m) in CD. Embellish face with sleepy eyelids using embroidery back stitch (see Pattern Notes). Securely knot or weave in CD on back of pillow.
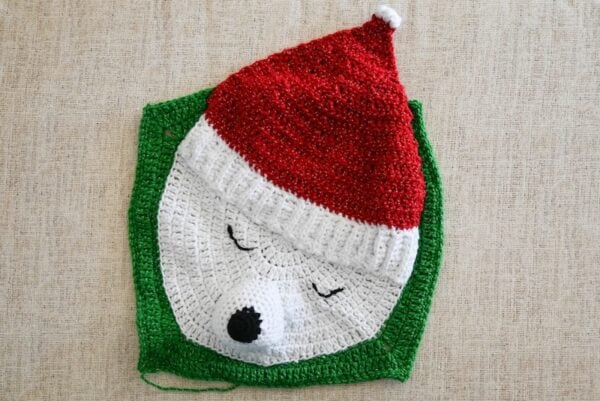
- Position Pillow Back and Pillow Front with wrong sides together and right (front) sides facing you.
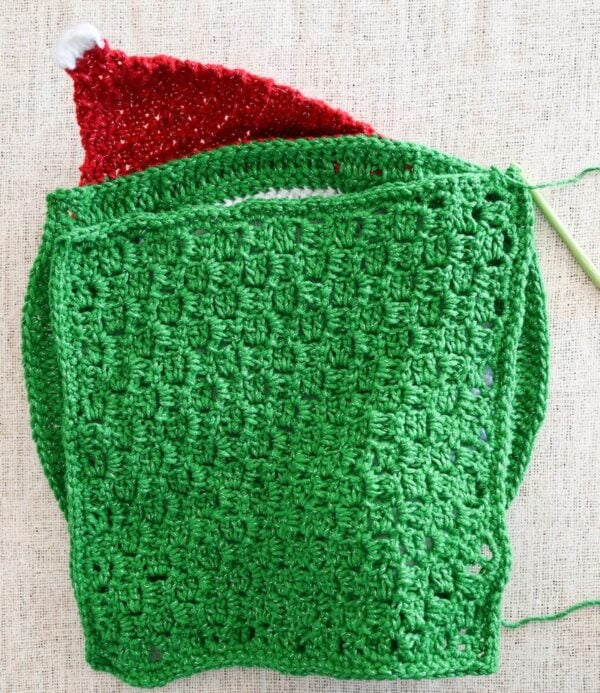
- Turn so that Front Pillow is facing you. Bring hook and yarn through ch-2 sp at side of the top edge of Front Pillow, join Pillow Front and Back on 3 sides (leaving the top/Santa Hat section unjoined) using the single crochet seam (see Pattern Notes) as follows: ch 1, [sc in ch-2 sp on Front and in center loop of first hdc on Back, sc in center loops of next 38 sts on both pieces, sc in ch-2 sp on Front and in center loop of last hdc on Back, ch 1] 3 times.
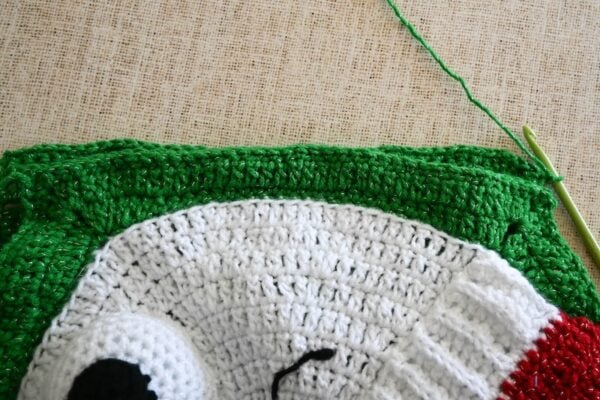
- When you reach the top (unjoined) side, continue working only on the Pillow Front. sl st in next 18 sts, ch 5, skip 2 sts, sl st in next 18 sts, join with sl st to first st on next side. Fasten off CC. With yarn needle, weave in ends on inside.
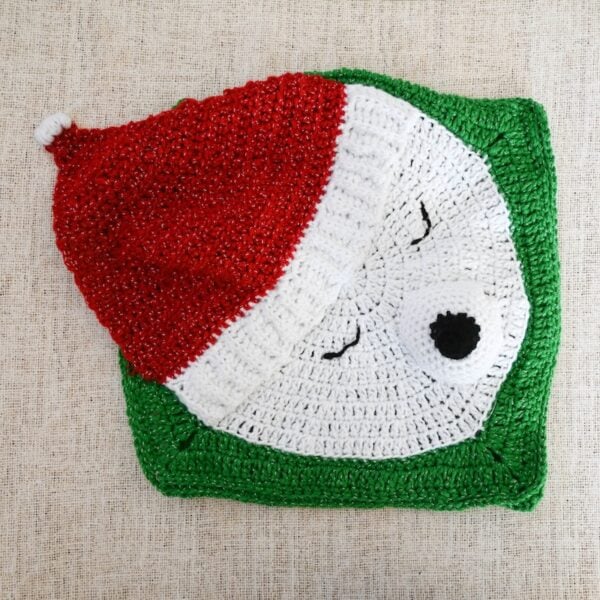
- Position button on Pillow Back so that ch-5 loop from Pillow Front is centered above button.. Thread yarn needle with 12″ (30.5 cm) in CC. Sew button into place on Pillow Back. Weave in yarn tails on inside of Pillow.
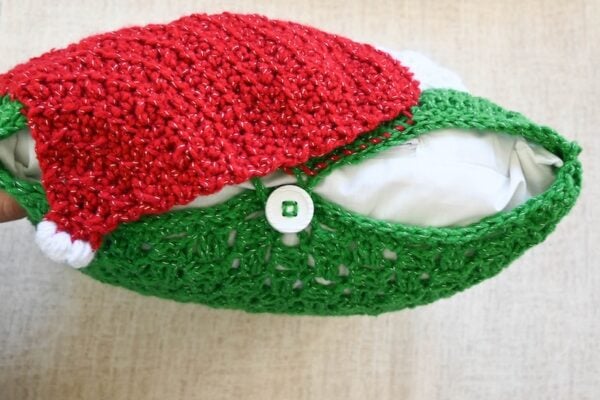
- Place pillow form inside and enjoy!